So you know what they say about idle hands right? If not, ask an older friend from anywhere east of the Midwest. Anyhow, I certainly did not want idle hands so while my husband and I watched this:
I was busy making these:
I made one and then the kids' reaction forced me to make another, and then another, and then... well you get it. Because they catch the breeze so beautifully, I may hang them on the porch around the Eid door sign I'm making. Thanks to http://howaboutorange.blogspot.com/ for the inspiration. I made the orange ones as a nod to her wonderful blog.
The how-tos:
You'll need one sheet of paper per ... thingy. The one above was made using 12x12 scrapbook paper, but the orange one used regular 8.5x11
Slice the paper into 2" strips
Stack the strips on top of each other and fold the stack in half to find the center point
(Now, here you are limited by your stapler, I happened to get a long-reach one as an early Eid gift)
Staple the stack together in the middle
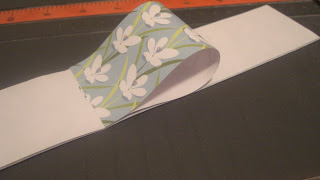
Put double-sided tape or a glue pen and make the inside top edge of the first strip sticky. Take that strip and fold the end towards the center. Press it down
Repeat with the rest of the strips. Every couple of loops, squeeze the center together. This is what it will look like halfway through
Flip the stack over and repeat until you've made a full circle. After you've finished, you can hang it up as above, or embellish it. They actually stand up so you could even replace the small circle I've used below with a bigger one and use it as a frame.
This is a really simple project for those of you just starting out in papercrafting. It's nearly impossible to "mess it up" and I timed myself: start to finish it took me less than five minutes. Give it a try and let me know how it goes.


thank you! I love how easy this is - almost instant creation-gratification!
ReplyDelete