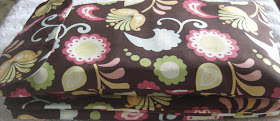
Also, my biological baby is now almost 11 months. And while she still enjoys the use of a diaper (and has many times tried to convert (revert?) us to to its convenience and that extra sumpthin' it gives your backside), she rarely needs the monstrous full-sized diaper bag I made for her way back when.
With little more than a scant yard of fabric and a Thursday afternoon that should have been spent finalizing a final, she is now the proud owner of:
this sleek, chic, mod diaper-ette and matching change pad.
What's that you say? A tutorial you say? When I should be making up fool-proof multiple choice questions?
Well of course!
Selma's little brown diaper clutch and change pad:
(or, I wish I had this with me when I made a quick visit to a friend's house and had to change Selma on their cold metal washing machine)You will need:
1 yard of fabric
a little bit (measure that carefully) of flannel, quilt batting, or an old sweater, etc....
Velcro
All the usual sewing suspects (thread, machine, ironing board, blah, blah, blah)
The pieces:
A, B, and C for the change pad, mine are: 12x24 but if your baby happens to be very tall or wide, you do what's right for you, we don't judge.
D and E (7x22) are the for the diaper pocket, one for the exterior, one for the lining. Oooooh yeah! We're lining alright! This isn't some two-bit operation.
F and G (4x7) are the flap to take this baby to a whole new level.
You'll notice my piece C looks like two pieces, well, as Joy Behar (or Fred Armisen playing Joy Behar says: So What, Who Cares!?
I didn't have enough so I had to piece two smaller pieces together, but so what? who cares? If you happen to have one piece big enough, then go on wichyobadself!
Lay out pieces A, B, and C in the following order: C: flannel (or fleece, or whatever soft thing you're using), then A right side up, then B right side down
Sew all three layers together leaving about 6 inches open on one of the long ends.
Use the 6 inch opening to turn the whole thing right-side-out with the flannel sanwiched in between the two pieces of fabric
Press the pad flat turning the raw edge at the opening in to match the seam of the rest of the pad. Then go over the whole thing with a topstitch to close off that opening.
You're done. Now on to the diaper clutch.
Take piece D and fold it in half with the right sides facing, sew up the sides and bottom leaving the top open.
Do the same with piece E and you should have:
Decide which one is your favorite and make it your external piece and make the other, lesser loved piece your lining. Turn them right side out and cast them aside.
Take pieces F and G and round the top two corners. I used my favorite mug from the Old St. Angela Inn. But I understand that not everyone has such a mug from such a place, so I suppose any old mug/cup/round shape would work ... I guess.
With right sides together, sew along the sides and top leaving the bottom open. Then notch (make little V cuts) around the curves. This will keep things tidy when you turn it out.
I also trimmed down the seam with my pinking shears. It's just how I roll.
Optional but recommended step: Once you turn it right side out, top stitch along the edge.
Slap that velcro on dead center.
Go grab pieces D and E. Take whichever one is your favorite (it should be right side out now) and
 |
| We will now call this piece "X" |
Find your sorely neglected piece E (he should be inside out) and put piece "X" INSIDE piece E with the flap sandwiched in between them. See look:
 |
| There's the flap there, you see the velcro? |
Turn the whole concoction right side out
 |
| Now you see the unsightly opening... |
 |
| Now you don't. |
Topstitch along the edge of the pouch (not the flap) to close the opening and you are DONE!
 |
| Oh yeah, the velcro on the pouch ... I won't insult you with details |
 |
| Three Size 5s fit snugly inside |
If you want to get super snazzy (and looking at the picture I may just do this myself), you can find these magnetic snaps at Michaels, Joanns, Hobby Lobby, etc...
and use those as closures instead.
 |
| Breaking it in... |


No comments:
Post a Comment